メールの送受信ができるようにします。
web-mailも使えると便利ですね。
メールの送受信には、SMTPサーバーと、POP3/IMAPサーバーが必要ですが、定番は以下のようです。
- SMTPサーバー : Postfix
- POP3/IMAPサーバー : Dovecot
まずは、さっくりとyumでインストールできるかな~と確かめてみます。
yum list | grep dovecot
dovecot.i686 1:2.2.10-8.el7 base
dovecot.x86_64 1:2.2.10-8.el7 base
dovecot-devel.x86_64 1:2.2.10-8.el7 base
dovecot-mysql.x86_64 1:2.2.10-8.el7 base
dovecot-pgsql.x86_64 1:2.2.10-8.el7 base
dovecot-pigeonhole.x86_64 1:2.2.10-8.el7 base
yum list | grep postfix
pcp-pmda-postfix.x86_64 3.11.8-7.el7 base
postfix.x86_64 2:2.10.1-6.el7 base
postfix-perl-scripts.x86_64 2:2.10.1-6.el7 base
postfix-sysvinit.noarch 2:2.10.1-6.el7 base
spamass-milter-postfix.noarch 0.4.0-7.el7 epel
おお! なんか簡単にできそうじゃないですか!
一応、本家のサイトに行って、最新のバージョンを確認…
あれま、dovecotはともかく、postfixはとっても古いじゃないですか…(^^ゞ
postfixのインストール
postfixにパッケージのインストールの解説がありますので、従います。
- リポジトリの追加
rpm –import http://mirror.ghettoforge.org/distributions/gf/RPM-GPG-KEY-gf.el7
rpm -Uvh http://mirror.ghettoforge.org/distributions/gf/gf-release-latest.gf.el7.noarch.rpm - postfixのインストール
yum install -y –enablerepo=gf-plus postfix3 postfix3-ldap postfix3-mysql postfix3-pcre
- 初期設定
cp /etc/postfix/main.cf /etc/postfix/main.cf.org
vim /etc/postfix/main.cf - ホストのホスト名とドメイン名を設定
myhostname = ホスト名
mydomain = ホスト名 - ローカルからのメール送信時の送信元メールアドレス@以降にドメイン名を付加する
myorigin = $mydomain
- 利用するインタフェースを設定
inet_interfaces = all (コメントアウト)
#inet_interfaces = localhost (コメントにする) - IPv6に未対応のため、以下の設定
inet_protocols = ipv4 (コメントアウト)
- 自ドメイン宛メールも受信出来るようにする。
#mydestination = $myhostname, localhost.$mydomain, localhost
mydestination = $myhostname, localhost.$mydomain, localhost, $mydomain - スプールをMaildir形式にする指定
home_mailbox = Maildir/ (コメントアウト)
- SMTP認証の設定を追加します。main.cfファイルの末尾に以下を追加して下さい。
smtpd_sasl_auth_enable = yes
broken_sasl_auth_clients = yes
smtpd_recipient_restrictions = permit_sasl_authenticated, reject_unauth_destination - master.cfも変更します。
cp /etc/postfix/master.cf /etc/postfix/master.cf.org
vim /etc/postfix/master.cf
submission inet n – n – – smtpd (コメントアウト)
-o smtpd_sasl_auth_enable=yes
-o smtpd_client_restrictions=$mua_client_restrictions(コメントアウト) - 起動&自動起動設定
systemctl start postfix
systemctl enable postfix - ポートを開く
iptables -A INPUT -p tcp –dport 25 -j ACCEPT
iptables -A OUTPUT -p tcp –dport 25 -j ACCEPT - iptablesの設定保存と再起動を忘れずに
iptables-save > /etc/sysconfig/iptables
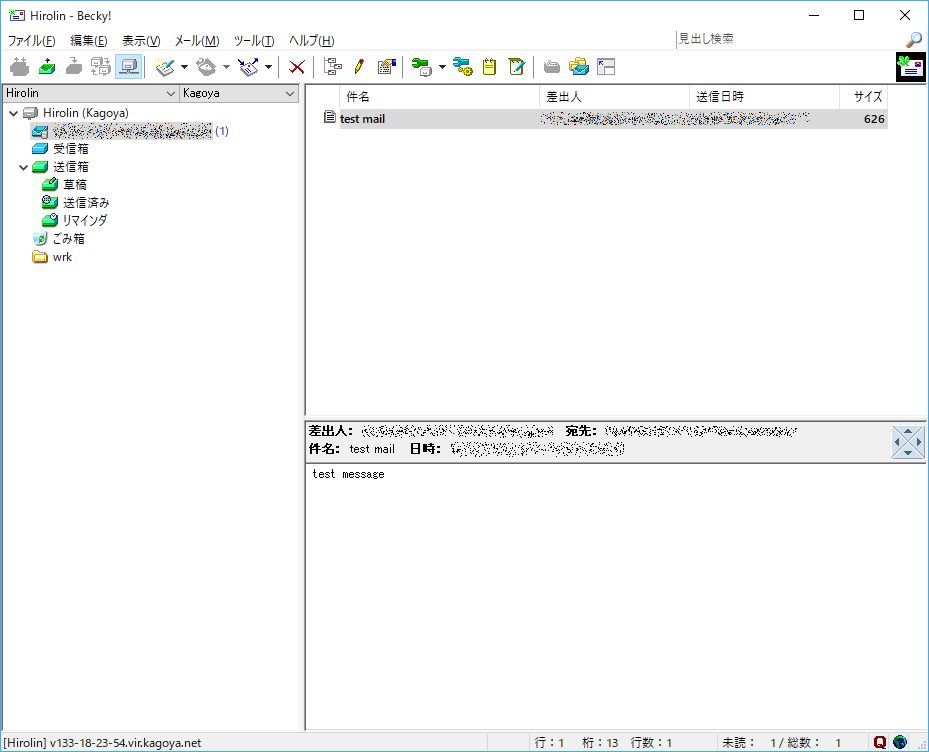
systemctl restart iptables.service - 動作確認
echo “test message” | mail -s “title” -r 発信元メールアドレス 送信先メールアドレス
メールが届いていればOK
Dovecotのインストール
最新バージョンは2.2.33.2ですが、yumでインストールできるのは2.2.10です。
おおきな差はないので、こちらはyumでインストールです。
yum install -y dovecot
- 初期設定
cp /etc/dovecot/dovecot.conf /etc/dovecot/dovecot.conf.org
vim /etc/dovecot/dovecot.conf
protocols = imap pop3 imaps pop3s (コメントアウト&変更)cp /etc/dovecot/conf.d/10-mail.conf /etc/dovecot/conf.d/10-mail.conf.org
vim /etc/dovecot/conf.d/10-mail.conf
mail_location = maildir:~/Maildircp /etc/dovecot/conf.d/10-auth.conf /etc/dovecot/conf.d/10-auth.conf.org
vim /etc/dovecot/conf.d/10-auth.conf
disable_plaintext_auth = no
auth_mechanisms = plain login - とりあえずは、SSL接続しない設定
cp /etc/dovecot/conf.d/10-ssl.conf /etc/dovecot/conf.d/10-ssl.conf.org
vim /etc/dovecot/conf.d/10-ssl.conf
#ssl = required
ssl = nocp /etc/dovecot/conf.d/20-pop3.conf /etc/dovecot/conf.d/20-pop3.conf.org
vim /etc/dovecot/conf.d/20-pop3.conf
#pop3_uidl_format = %08Xu%08Xv
pop3_uidl_format = %uprotocols = imap pop3 (コメントアウト、行末のlmtpは削除)
mail_location = maildir:%h/Maildir (追加)
listen = * (コメントアウト、行末の,::は削除)
disable_plaintext_auth = no(←行を追加) - ポートを開く
iptables -A INPUT -p tcp –dport 110 -j ACCEPT
iptables -A OUTPUT -p tcp –dport 110 -j ACCEPT
iptables -A INPUT -p tcp –dport 143 -j ACCEPT
iptables -A OUTPUT -p tcp –dport 143 -j ACCEPT - iptablesの設定保存と再起動を忘れずに
iptables-save > /etc/sysconfig/iptables
systemctl restart iptables.service - 起動&自動起動設定
systemctl start dovecot
systemctl enable dovecot - 接続確認
メールクライアントソフトからアクセス。
無事に接続できてメールが読めればOK

コメント